We Are Here to Help!
Get pricing details and strategies that will work for your business.
By following these easy steps, you can avoid some of the most common print file issues.
1. Creating the correct size Canva document
From the main screen in Canva click on the "Create A Design" button in the top right corner. Then in the drop down menu select "Custom size". In the menu make sure the units in the right drop down is set to "in" then enter the final trim size of your postcard (EXAMPLE SIZE: 8.5 w X 5.5 h). This size may be different than what you ordered, please refer to your invoice for the correct size. Then click the "Create new design" button to open a new document.
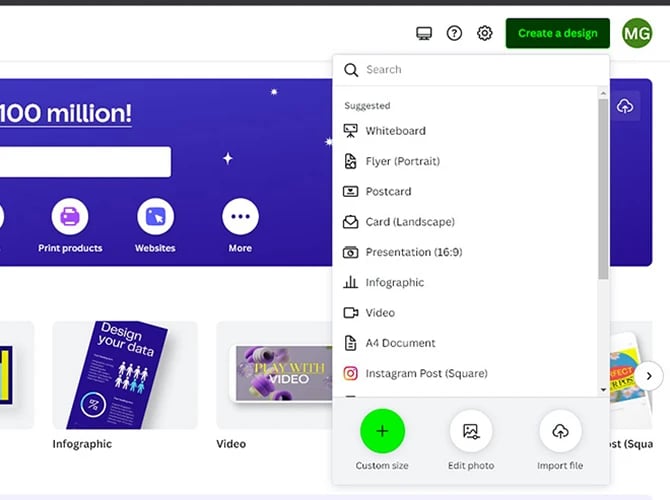 Create a Custom Size Design
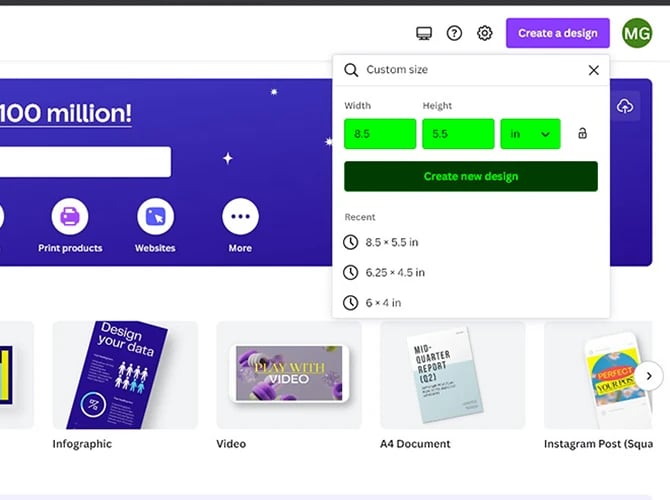 Enter the dimensions of the postcard you ordered
2. Turning on bleeds, rulers & guides
In the top bar of your Canva editor click on the File menu to open a drop down menu. In this menu hover on the "View settings" then in the pop out menu click on both "Show rulers and guides" & "Show print bleed". When they are turned on there will be checkmarks to their right.
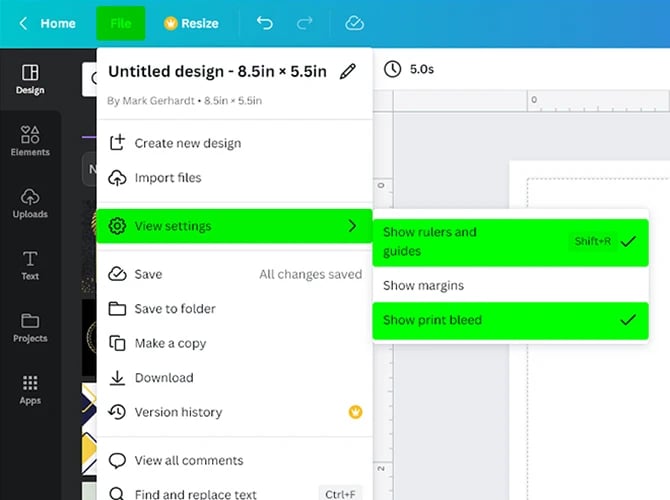 Turn on rulers, guides and print bleed in Canva file menu
3. Uploading template files
Click on the uploads tab on the left of the editor screen. Then either drag and drop the jpeg template files into the dashed outline or click on the purple "Upload files" button and select the files to upload.
You can find our template files here: Postcard Templates
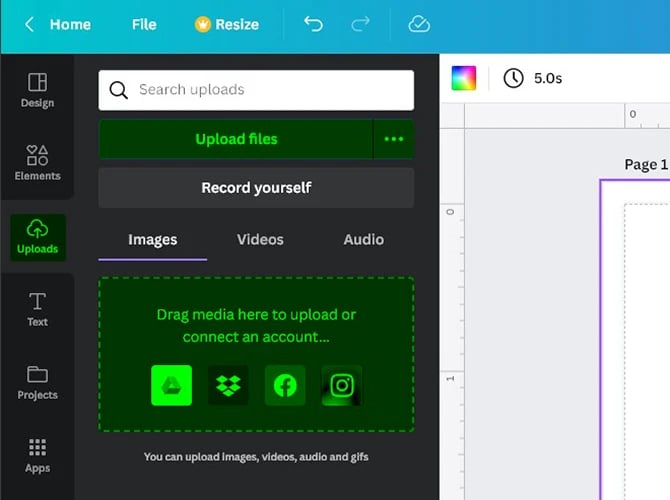 Uploading template jpeg files
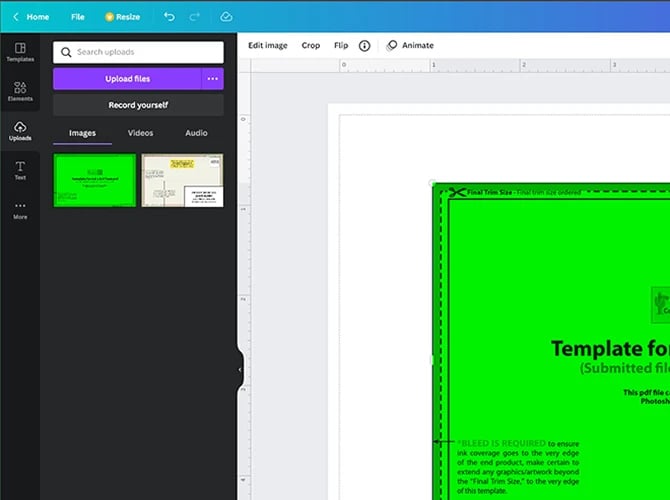 Insert the template image
4. Placing and sizing template files
Click on the thumbnail of the front (non-address side) template. It will place the file centered but undersize. Resize the template image by clicking and dragging on the corners until it fills the entire space including the bleed. The image will now lock into the background.
To add the back you will need to click on the "+ Add page" button at the bottom of the screen. Then repeat the steps to place and resize the back to fill the space.
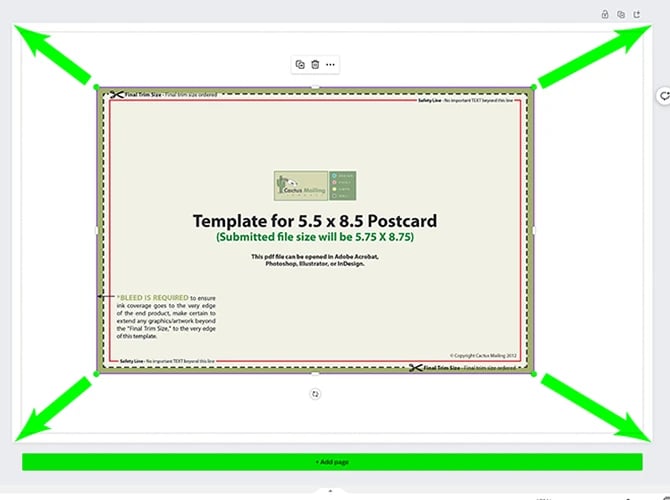 Resize the template image
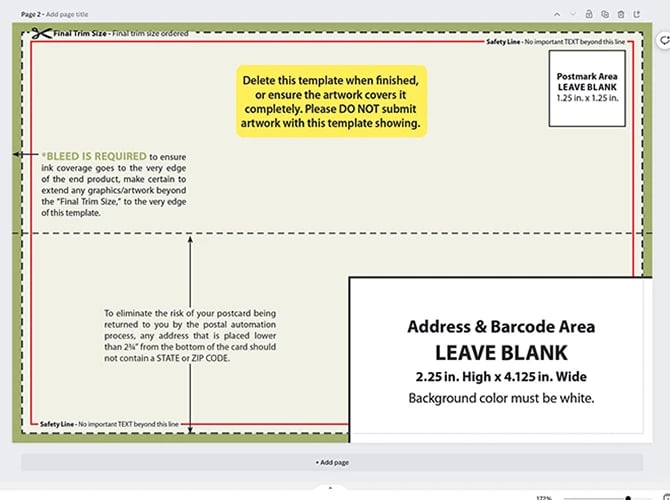 Template image resized to fill document
5. Adding guides
Click and drag from the ruler at the top to create a purple guideline, release the line when it is aligned with the top red safety line in the template. Repeat this to add guides to each safety line and the edges of the address block and postage area. Pulling from the side ruler to add vertical guidelines.
Double click on the template image to select it and press the delete or backspace key to delete it from the document. This will leave a blank page with purple guidelines to follow.
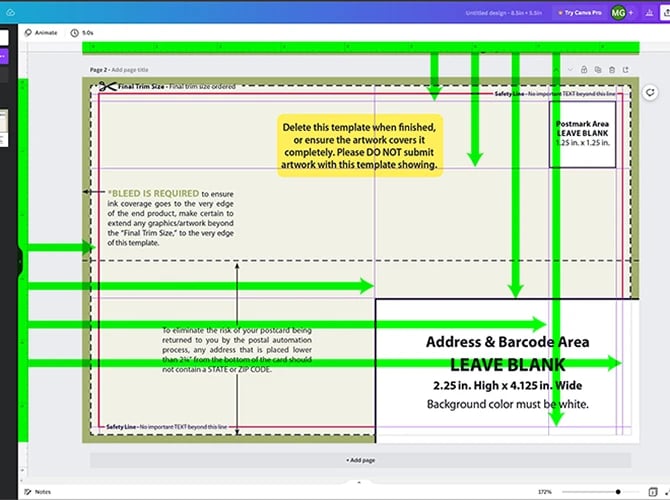 Drag guides to safety line and address block
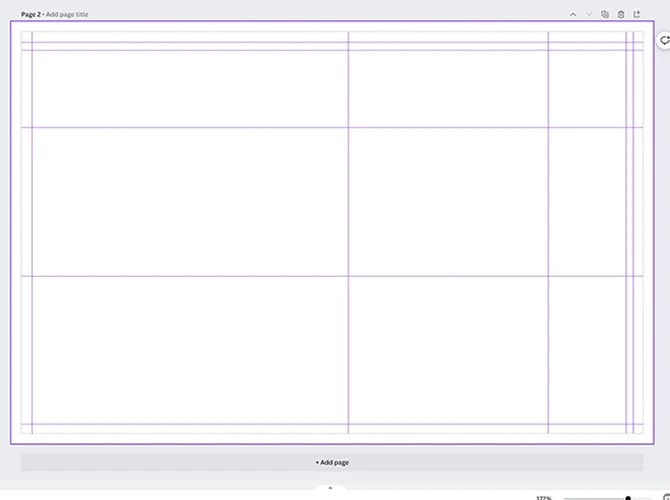 Template image removed with guides showing
Keep reading for important instructions for downloading your files.
Key points before downloading your file
- When placing logos and text be sure to keep it inside the safety line area, if content is too close to the trim line (light gray dashed line) it may be cut off in production.
- Ensure that any images or backgrounds that you want to go to the edge of the postcard extend all the way through the bleed (the very edge of the document, outside the light gray dashed line). Any areas missing bleed could print with a thin line along the edge.
- Your entire address block must be 100% white.
- Leave space for the postage that is free of text or any content you do not want covered by the Postal Indicia.
Downloading your file
When you are ready to download the file click on the "Share" button then click on "Download". In the Download menu select "PDF Print" and check the box next to "Crop marks and bleed". Finally click the "Download" button and select where to save your file.
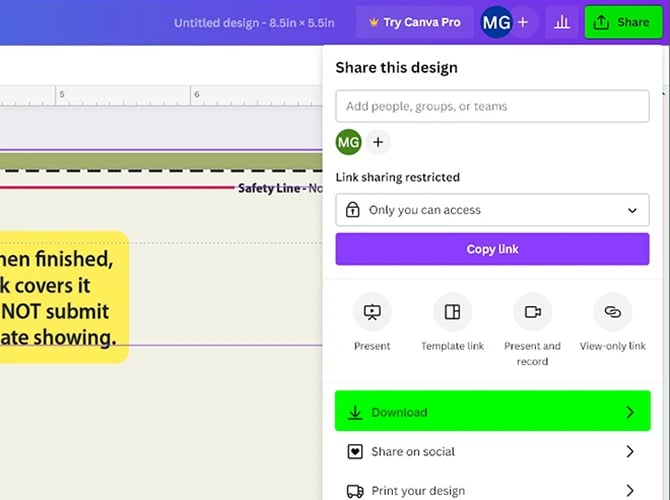 Open share menu and select download
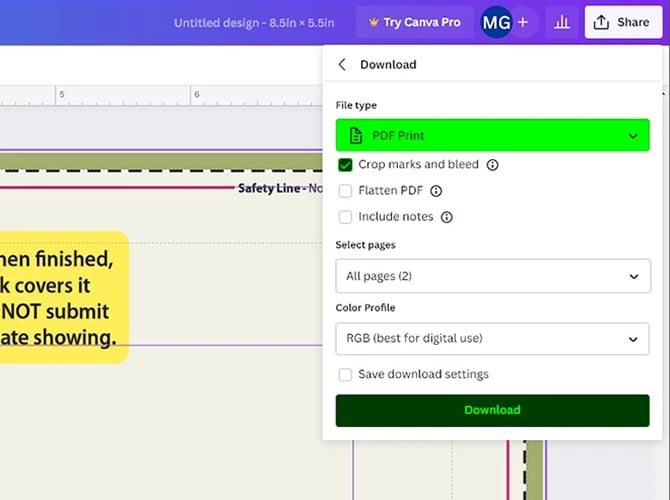

 Mark Gerhardt: Jan 11, 2023
 Jill Brown
 Mike Ryan